Featured Images are the images that represent the post or the page or custom post types. It was introduced in WordPress Version 2.9 with the name of “Post Thumbnails” and was later named as “Featured Images” in Version 3.0. These images are useful when each post carries an image. This feature is being used at this blog too.
Related Articles
A Little Bit Of History
In WordPress Versions prior to 2.9, developers had to write a complex code in functions.php file which would extract the first image from all the images in that particular post. Then they would display it wherever it was required, mostly the index and the archive pages.
Starting With The WordPress Featured Images
WordPress Featured Images are optional and may or may not be available in your theme. Read below to know how to enable them and to change their default size.
Add the Support for WordPress Featured Images in Your Theme
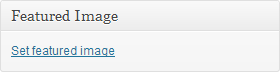
Theme developers need to add a single line of code which will allow Administrators to give a featured image to any post or page from the WordPress dashboard. It may or may not be present in your theme. For a quick check go to your WordPress dashboard and try to write a new post. If you can see the “Featured image” box as shown in the image below then jump to the next step.
If you can’t see it, paste the below code in your “functions.php” file within the php tags.
add_theme_support( 'post-thumbnails' );
Now again try to create a new post and you will see the “Featured Image” box.
Change WordPress Featured Image Size
WordPress by default has some standard sizes ( small, medium, large, etc… ) in which it crops your images when you upload them using the standard WordPress Media Uploader.
But WordPress does not confine you to use only these sizes. You can define your own sizes and WordPress will crop the image to your custom sizes as well. We will talk about making your own image sizes later in the article.
set_post_thumbnail_size( 100, 100 );
The code above changes the featured image size to a maximum of 100px in height and width. If your image is not a square then the larger side will be 100px in length and the smaller will be adjusted to keep the image in the same ratio as the original. The code needs to go to the “functions.php” file.
set_post_thumbnail_size( 100, 100, true );
If you add “true” as the third argument then your image will be cropped to the exact size you specify in the code. For example, if your image is 400px by 200px in size, then instead of the cropped image being 100px by 50px in size, as in the former case, it will now be 100px by 100px. That means it will not consider the aspect ratio. The code again will go to “functions.php” file.
Creating a Custom Size for WordPress Images
Till now we have changed the featured image size in our WordPress theme. But we can make any number of different sizes to be used in our WordPress template.
add_image_size( 'smallest', 50, 50 ) ;
The code above will generate a new custom size for our images with a height and width of 50px each. Here, the custom name for your custom image size is the first argument, i.e. “smallest” in our example. You can still use the “true” attribute as the fourth argument to crop the image to the exact dimensions.
Using the Custom Image Size in Your Template
Now that WordPress is creating images with our desired dimensions, we need to make use of them somewhere. “the_post_thumbnail( )” is the function that we can call anywhere to get the image with our custom dimensions.
<?php the_post_thumbnail('smallest'); ?>
The name for the custom size needs to be passed as an argument in the function to tell WordPress which image size we want to retrieve, “smallest” in the above case.
You can create as many image sizes as you want in your theme. This is the beauty of WordPress. And calling them is super easy as you can see above.
You can also add featured image to your RSS feeds.
Further Reading : WordPress Codex