Changing the logon screen on earlier versions of Windows was not an easy job. But with Windows 7, you just need to edit a DWORD key in registry editor and copy paste the background you want to see on the logon screen to a folder in your Windows installation drive. You can also change the logon screen using Windows 7 logon background changer
Related Articles
Change Logon Screen on Windows 7
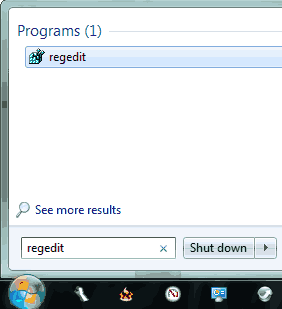
- Open Registry Editor. This can be done by opening start menu search and typing Regedit.
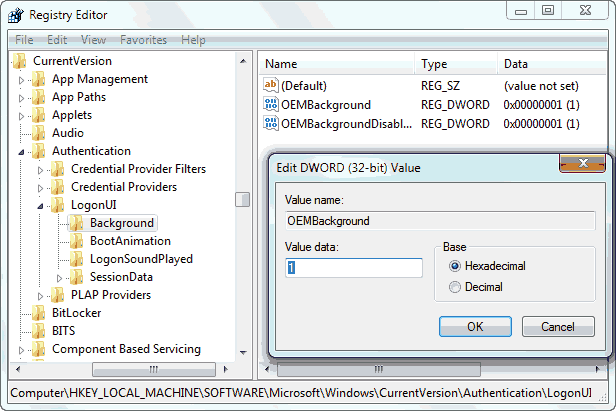
- Now once you open Registry Editor, navigate to “HKEY_LOCAL_MACHINE > Software > Microsoft > Windows > CurrentVersion > Authentication > LogonUI > Background“
- Now here you will see a DWORD entry called “OEMBackground”. Double click on it and change the value to “1”. If you can’t find the entry, create a new one. It can be done by choosing “Edit > New > DWORD“.
- Now close the “Registry Editor” and choose the desktop background. Make sure that it is less than 256KB in size and it has the same aspect ratio as your screen. This is to make sure that your image does not gets stretched when shown at the logon screen.
- Once you have selected the image, change it’s name to “backgroundDefault.jpg” and save it to “%windir% > system32 > oobe > info > backgrounds”. The “%windir” folder is usually “C: > Windows”. If you can’t find the info folder then create the info and the backgrounds folders and paste your desired background image in it.


