Skip to content

Mstoic

  • Home
  • Start Here!
  • Best Deals
  • Facebook Tricks
  • Privacy
  • Resources
  • TOC
  • Tools
    • Web Tools
      • Stop Watch
      • QR Code Generator
      • Adsense Code Converter
      • Blogger Sitemap Generator
      • Difference Between Two Texts
      • Vacation Checklist
      • Twitter Symbols
      • Count Down
    • Investment
      • SIP Calculator
      • Power of Compounding
      • PPF Calculator
      • FD Calculator
  • About Us

How To Change Processor Details In Windows

Editorial Team | November 1, 2013 | Tricks, Windows |

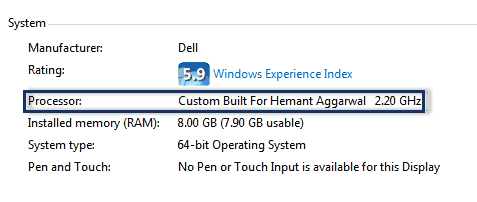
If you view properties of your computer by right-clicking on it and selecting “Properties”, you will see your Processor listed in the system section under basic information about your computer. This information is auto-generated and not entered by you. So you don’t ever get an option to edit this information anyhow. But, we have a simple way to do this by editing your registry.

  • Change Windows Installation date using Registry Editor
  • Speed up your Windows computer using MSCONFIG
  • Add items to Windows send to menu and find a hidden one
  • Block ads on YouTube

You can change your Processor information to anything you want. You can show any latest processor, a processor which is quite costly, or even your own name. There’s no validation on what you change it to. After changing it, you can then show this to your friends and make them scratch their head 🙂

Change-Processor-Details

Changing Processor Details in Windows

  1. First open the “Registry Editor”. This can be done by pressing “Win + R” key combination and then typing “Regedit” in the run dialog box.
  2. Now navigate to ” HKEY_LOCAL_MACHINE > HARDWARE > DESCRIPTION > System > Central Processor > 0. “
  3. Here you will find a key named “ProcessorNameString“. Double click on it.
  4. Now you will see the value which is exactly what you see for “Processor” in properties of your computer. Change it to whatever you want and press “OK”.
  5. Changing-Processor-Configuration-Windows
  6. Now again see the properties of your computer and you will see the changed value. This also changes the value of the processor that is displayed at the bottom of Windows Explorer.
Previous Post

Transform Windows 7 and Windows 8 to Android KitKat Like Look

by Editorial Team

Next Post

7 Tips And Tricks Towards a Better Gmail Experience

Gmail

by Editorial Team

Recommended Next
Control Windows Media Player With Hand Gestures Using Flutter

Your Comment Cancel reply

Follow Us

Like us Follow us Follow us

Categories

  • Tricks (93)
  • Facebook (83)
  • Tips (76)
  • Windows (67)
  • Wordpress (39)
  • Android (38)
  • Internet (33)
  • Antivirus (30)
  • How To (29)
  • Webmasters (25)
  • Customization (25)
  • Downloads (21)
  • Utilities (21)
  • Gmail (20)
  • Windows 7 (19)

Related Articles

  • Reverse a String using StringBuilder