Many people ask me if they can convert a word document to a JPEG file. I tell them the steps, but they find it really difficult and complicated to follow. So this tutorial will help you out if you want to convert any word document, be it doc or docx, to any image format.
Related Articles
Convert Word to JPEG
There are three ways of going about it. First is to use a Snipping tool, available in Windows Vista and later versions. Second is to use Paint, available in all the versions of Windows. The third one is the easiest and the cleanest method but requires OneNote, an application Microsoft launched in 2003 and is shipped with Microsoft Office.
Convert Using Snipping Tool
- Open the Word document you want to save in the JPEG format.
- Make the zoom percentage to 100%. This will make the image clear and readable.
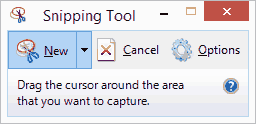
- Open “Snipping tool“. Either type it in the search box in the “Start Menu” or navigate to “Start > All Programs > Accessories > Snipping Tool”.
- Click “New” in the snipping tool and drag the rectangular box so that it covers the viewable part of the document.
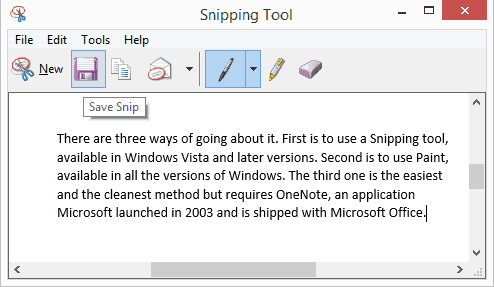
- Then click on “Save Snip” and type in any name you want.
The steps 4-5 may be repeated in case your document is long. Then you may also need to club those images, which can be done using the “Paint” tool, by pasting one below the other in the same order as in the Word document.
TIP If you are not worried about the quality, then you can zoom out of the page, until it is completely visible, and then you can use the snipping tool. But make sure that the content is readable.
Converting Word to JPEG Using “Paint”
If you have Windows XP or earlier installed, then you will not find the “Snipping tool”. As an alternative, you can use “Paint”.
- Open the Word document and zoom it to 100%
- Now tap the “Print Screen” button on the keyboard, usually labelled as “PrntScr”. This will copy the entire screen’s screenshot on your clipboard.
- Now open “Paint” and select “Paste” from the menu. You can also use the “Ctrl+V” keyboard shortcut.
- Crop the picture and delete all the irrelevant area.
- Finally, save this file in JPEG format and give it any desired name.
Doc to JPEG Using OneNote
This is the simplest method of doing this, but involves an additional program, i.e., OneNote. Nowadays, OneNote is shipped along with Microsoft Office and you may have it installed on your PC. If you have it then convert Word files to JPEG the easiest way.
- Open the Word document you want to save as JPEG.
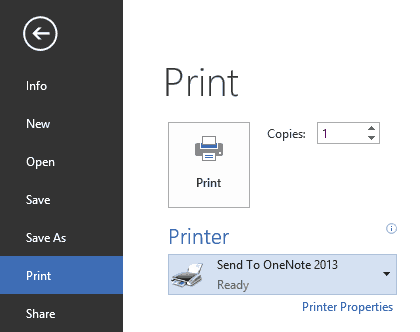
- Select “File > Print” or click the “Ctrl + P” keyboard shortcut. When the Print window opens, select “Send to OneNote” and click the “Print” button.
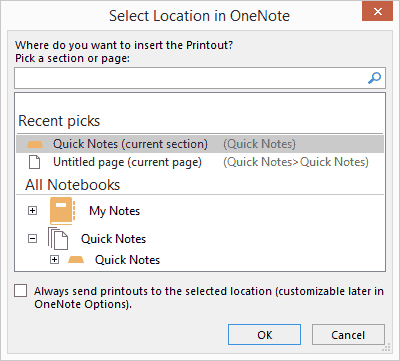
- Now OneNote will appear on screen. Select the location in OneNote. For our purpose you can save it in Quick Notes, because we will not need it in the future.
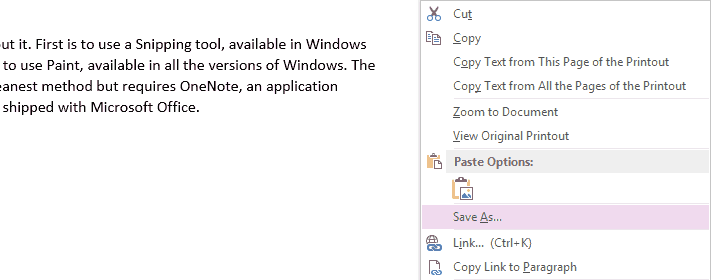
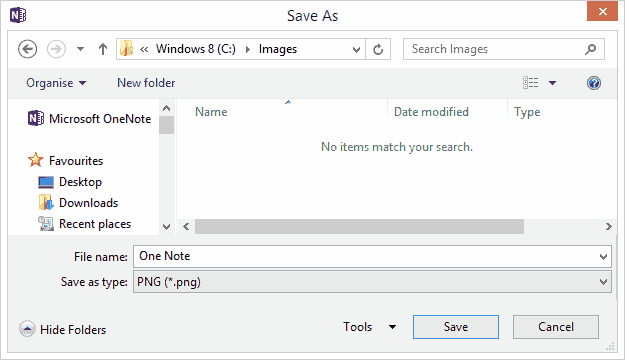
- Now you will see different images for all the pages you had in your document. Right click on all the images one by one and choose “Save As”.
- Give them any name and save them at your desired location.
- Your images will be saved in PNG format. If you want them particularly in JPEG, then you can use RIOT to do that.

VERY VERY GOOOOOOOOD SITE I HAVE SEEN.