One of the most exhilarating feature of Photoshop is the “Content Aware Fill” tool. Sometimes it happens that you capture some image but some unwanted objects get captured along with it. But you have no way to remove them, because if you try to remove that object it will also remove its surrounding area and this will lead to the loss in the originality of the image. So the best way to remove the undesired part from an image without affecting the background and also enhancing the beauty of the image can be achieved through the Content Aware Tool. This is really simple to use and requires very little knowledge to work on it. Follow the steps below and you will surely succeed in discarding the unwanted objects from your image.
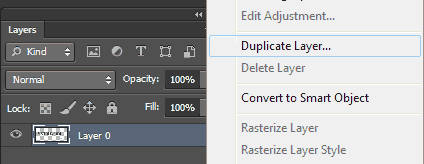
Open the image by selecting the File from the top menu bar and then click the open button and select the desired image. The best practice is to duplicate the image into another layer just to avoid any permanent changes. For duplicating the image just move to the layer panel on the extreme right and right-click on the image, i.e. the Background layer and select duplicate layer option and now work in this new generated layer.
Now you need to select the unwanted object. It is not necessary for the object to be in regular shape. It can be in irregular form too.
There are some tools to select the object:
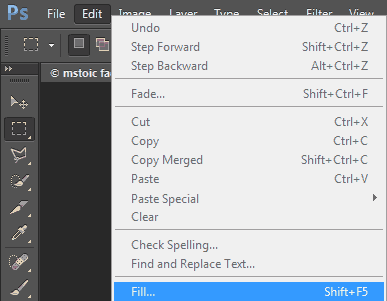
If you have a regular shaped object like square, rectangle, etc, then you can select the object by Rectangular, Elliptical Marquee tool. If the object is in some random form, then you can select it by Lasso, Polygonal Lasso tool. After selecting the object for removal, click on the “Edit” button from the Menu bar and select the Fill option under it or you can also press the “Shift+F5” shortcut key.
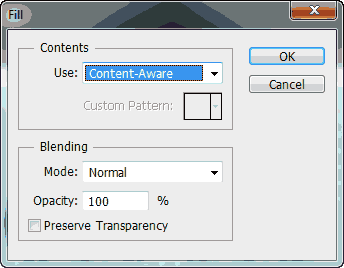
When the Fill dialogue box appears, choose “Content-Aware” under the Contents box and then click the OK button.
The working behind this effect is that when you select the unwanted element that is to be discarded, then you apply content aware fill.This feature studies the surroundings of the object to be removed and fills the pixels with the fetched value which it got from its surroundings. But sometimes it also happen that the result is not according to our expectations and some undesired elements appear, which can then be resolved by subsequently applying content aware fill effect. By this you can get the desired image. This tool can be applied any number of times to obtain the correct image .
After that you need to erase the select lines, which can be done simply right-clicking on the selected area and choosing Deselect. You can also do it by pressing the “Ctrl +D” key combination.
You can pat your back once you successfully remove the unwanted objects.