Sometimes it happens that our image’s background is quite disturbing and we want to reduce its effect and focus on a particular part of the image. This effect can be achieved through “Blur” tool. In Photoshop we have three types of blur effects and they have different applications too depending on our requirement. If you are new to Photoshop, you will also love to learn different ways of zooming in and out inside Photoshop
1. IRIS Blur
This is the easiest type of blur which you can perform. With this tool you can focus on a part of the image and blur the rest of the it.
Performing The IRIS Blur In Photoshop
- Open your desired image first.
- Now create a duplicate layer of it and work in the duplicate layer only. This is to avoid any permanent changes to the original image.
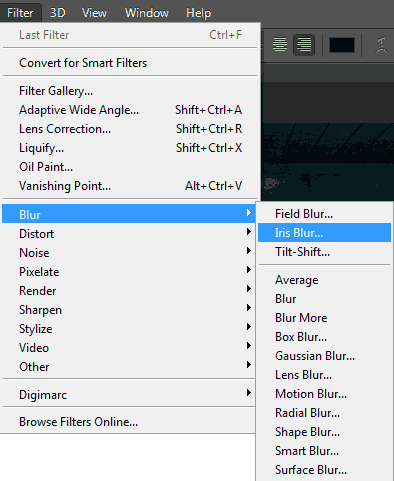
- Now select the Filter field from the top Menu bar.
- Now click on the Blur tool and under this choose Iris Blur.
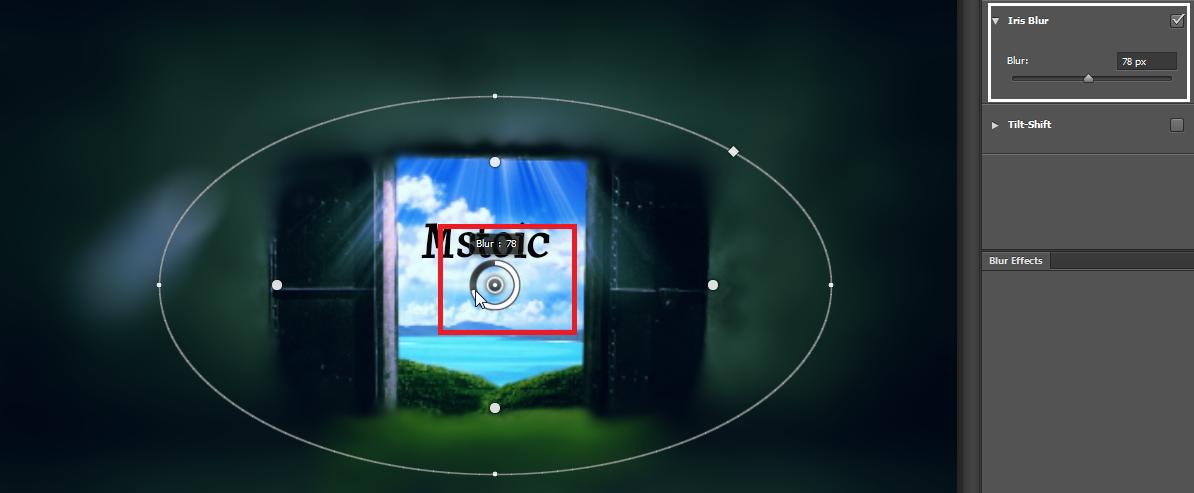
- Then you will see an ellipse on the image. This ellipse depicts the part to be focused. You can also control the intensity of the blur filter either by dragging the blur slider present on the blur panel at right-side or you can hover at concentric circle icon at the center of the ellipse.
- You can also change the size of the ellipse by dragging the overlays, viz, the small dots at the boundary of the ellipse. Four overlays (small points) are also present inside the ellipse and these are used to make the focus on the object finer.
- Another thing you can do here is that you can change the direction of the ellipse for changing the focus on the object.
- You can also remove all the overlays points simply by clicking on
 icon on option bar. If you want to hide the overlays just to check how picture looks with blur effect, the easiest way is to press the “H” key on the keyboard, which will hide or show the overlays.
 - After all the changes are done and you are satisfied with the blur effect, press OK button on the top to apply the changes on the image. You can also Preview before applying any permanent changes, this is to ensure that your image looks exactly what you want it to be.


2. FIELD Blur
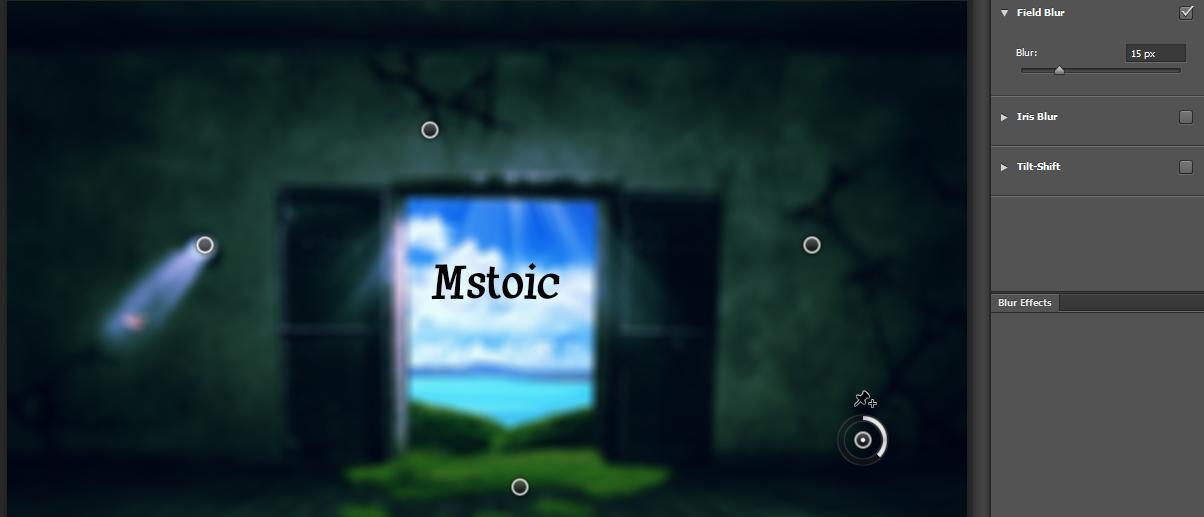
Field blur is a precise way of adding blur effect. In this type of blur you can control different regions of your interest by adding or removing the overlays (small points), at different locations in an image. You can then give the individual points the different blur percentages. To apply Field blur navigate to “Filter > Blur > Field Blur” from the Menu bar. Now add different points by clicking on different locations on the image where you need the blur effect.

After placing the points, you can change the blur values of individual points by clicking on any point and then either changing the value by sliding the blur slider or by hovering over the point. The points can be moved easily to other desired position just by dragging them. The FIELD blur effect creates impressive effects which can never be created by a non-DSLR camera.
3. TILT-SHIFT Blur
This is another type of blur which gives a miniature effect. In this you can define the area of focus and rest of the part is blurred. This works best for those images which are taken from overhead and looking down to the object at certain angle.

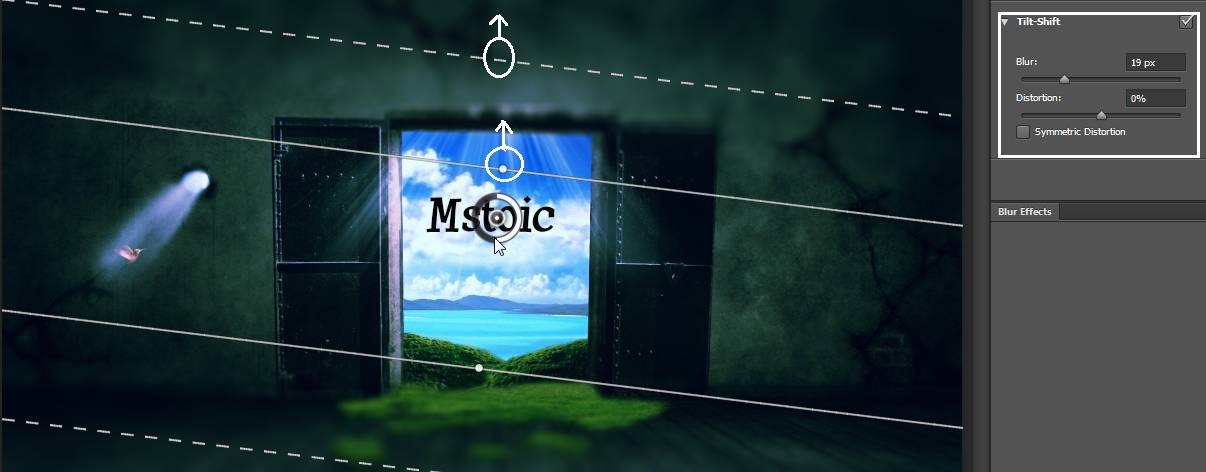
To apply this effect, navigate to “Filter > Blur > Tilt-shift“. Now you can see some on-screen controls. Similar to the other blur effects, in this you have a single point and you can place this point where you want to focus. The solid circle controls the transition area of the blur. You need to drag the solid lines upwards or downwards for increasing or decreasing the focus area respectively. The dotted line shows how far the blur will effect the image. The intensity can be changed from either the slider on blur panel or by hovering over the points. You can also rotate the points by 360 degrees. Another option is Distortion, which is used to provide motion effect to the blur. Initially it is set to 0% which implies that no distortion is applied. But you can increase its value by dragging towards right, this will give a slight zoom effect to the blurring. Dragging the slider towards left will give a radial effect to the blurring. Distortion is applied to the bottom part of the image by default. If you want to include the top part of the image too, then you need to check the “Symmetric Distortion” option below the distortion slider. If you are satisfied with the effect press OK and apply the effect to you image.
Blur Filter is really a powerful tool in Photoshop and you can put life to an image.
