Most people when start using Macintosh struggle with the small size of the text and end up installing Windows on their Macbook or iMac. But there are many ways you could simply make text bigger on Mac and set it according to your needs. I will show you two ways by which you can easily make the text bigger on your Mac.
By Scaling The Resolution
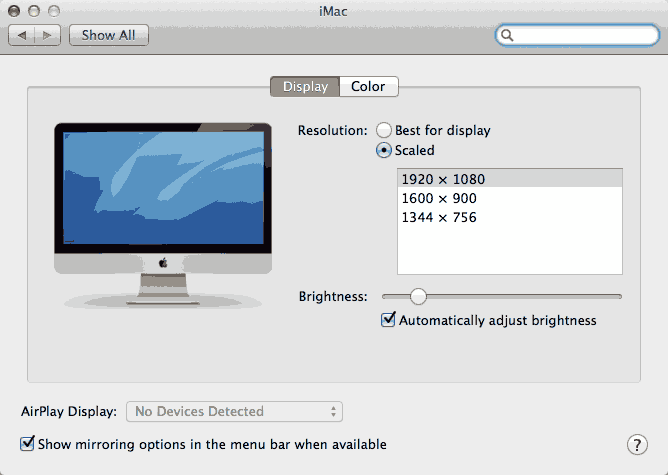
Resolution of any Macintosh device is set to display the best picture to you (the highest resolution is the best in most cases). But this is not set in stone, you can easily change your screen’s resolution from System Preferences.
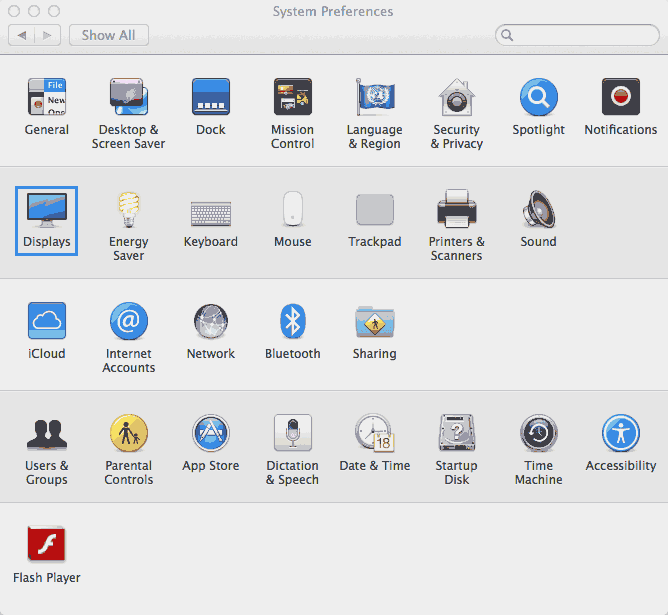
To change your screen’s resolution, open System Preferences. Now select “Display” and select the Scaled option under Resolution. This will unveil the different resolutions supported by your device. You can choose any resolution below your current resolution to make text bigger on your Mac.
Make Text Bigger On Mac By Increasing Font Sizes
There is no straight procedure to increase font size on Mac other than scaling. You need to change text size for different apps and panes to make text bigger on Mac. Use this method only if you are not happy with the scaling method discussed above.
Increasing Text Size For Finder App
I spend most of my time in the Finder app for exploring and dealing with files and folders on my Mac. Increasing the font size for the labels of the files and folders was my primary concern, and doing this was not difficult at all.
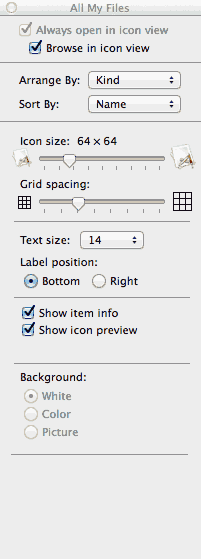
Open the Finder app and press the “Command + J” key combination. This brings the “View Options” menu where you can change the text size, the icon size and the grid spacing (spacing between icons).
This will not change the size of the labels in the sidebar (left pane). To increase the font size of the icons in the sidebar – open “System Preferences > General” and change the options in “Sidebar icon size“. You get three icon sizes here, Small, Medium and Large. Small is set by default.
Make Text Bigger In Apple Safari
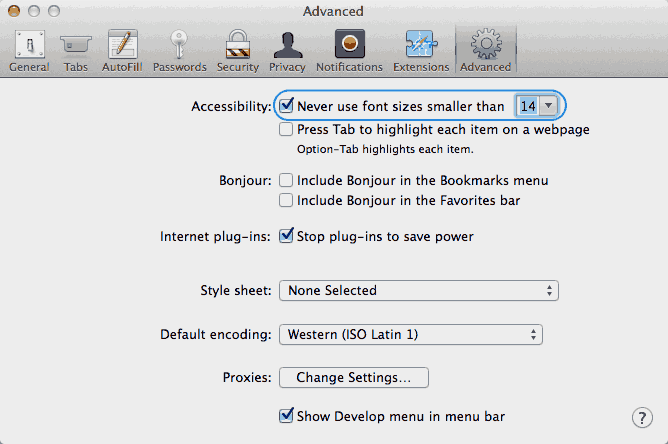
Another most used application on any Macintosh device is the in-built app for web browsing, Apple Safari. Apple Safari allows you to set the smallest font size that will be used to display the web pages. You can set it to a value you find readable. Navigate to “Preferences > Advanced” and set the font size under the “Never use font sizes smaller than” label.
Make Text Bigger In Chrome On Mac
Most people prefer Google Chrome over Apple Safari for web browsing because it offers better cross-platform syncing.
Making Text Bigger In Google Chrome:
- Open chrome://settings/ in the address bar.
- Scroll down to the bottom and click the “Show advanced settings…” button.
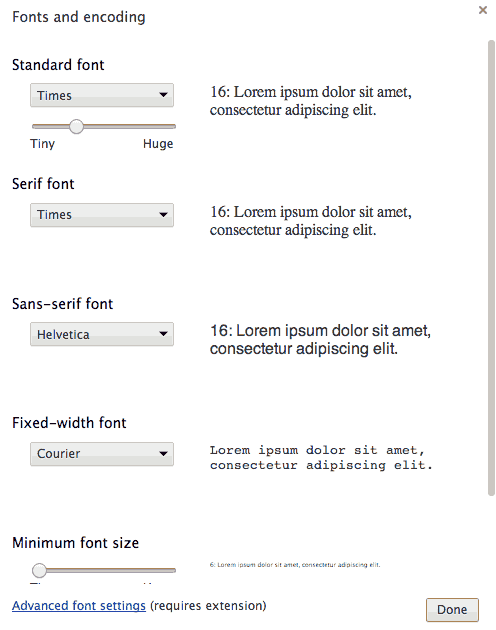
- Scroll down to the “Web content” section and click the “Customize fonts…” button.
- On the window that pops up, you can specify the font size of various font types in Google Chrome. Like in Apple Safari, you can also set the smallest font size inside Google Chrome.

Increasing Font Size For Mail And Messages App On Mac
Mac is capable of customizing font size of almost every app. The text size of the Mail and the Messages app can be increased by navigating to the app preferences from the apps individually and then making the text size bigger.
Make Text Bigger In Mail App
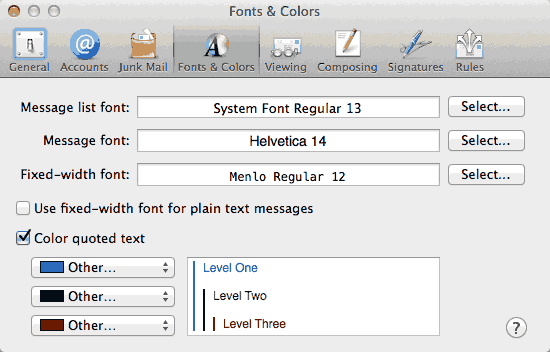
Open the Mail app and navigate to “Mail > Preferences” from the top bar and then go to the “Fonts & Colors” tab. Here you can select the text size to be used in different parts of the Mail app.
Make Text Bigger In Messages App
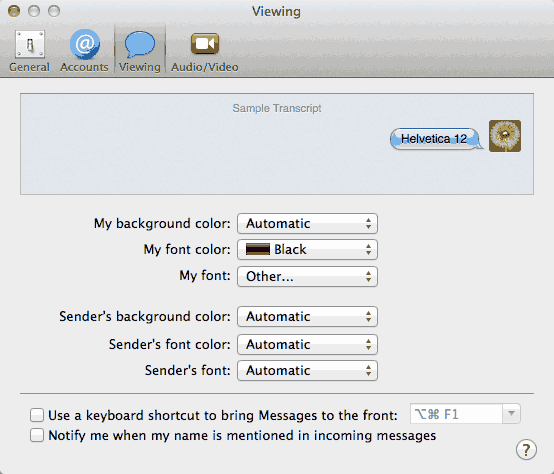
Similar to the Mail app, text can be made bigger in Messages app. To do this, open the Messages app and navigate to “Messages > Preferences” and then go to the “Viewing” tab. In this tab you can set the color, style and size of the fonts used in the Messages app.
Increasing Text Size While Editing Documents
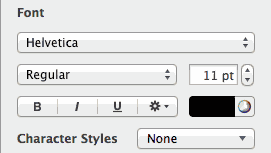
This is pretty straightforward if you use the Pages app that comes with Mac today. For the less tech savvy – you can change the text size from the right pane under the Font menu in the Pages app. Not only for Pages, other text editing app also have a very simple approach to making text bigger or smaller, because this is what most people want to do while typing documents.
Use Zoom For Everything Else
Macintosh comes with a Zoom feature that can be used in any app and with any type of content, be it text, images or videos.
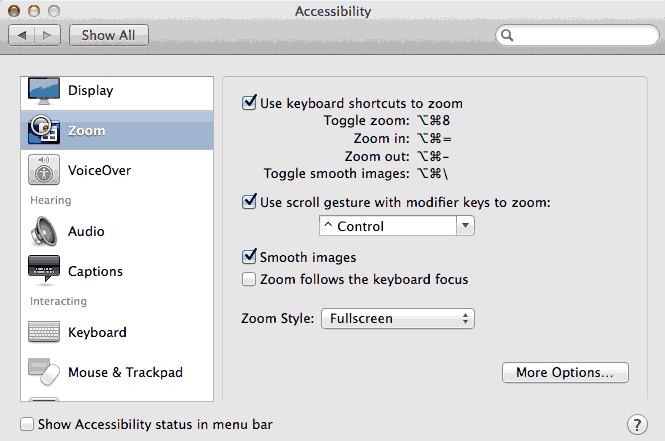
To enable zoom using Mouse Gestures or Keyboard shortcuts – navigate to ” System Preferences > Accessibility ” and choose “Zoom” from the left pane. Now here you can enable zoom feature using your keyboard and also enable and configure it using mouse gestures.
Verdict
If your Mac allows you to change resolution then I will recommend you to make text bigger by scaling. If your Mac doesn’t permit that, or you don’t want to use it for any other reason, you can use the other ways of making text bigger for individual apps.
