Macintosh comes with a great and simple application to take backup of everything you have on your Macintosh device, called the Time Machine. You just need an external storage device and your Macintosh machine, to start backing up your data.
How Time Machine Works
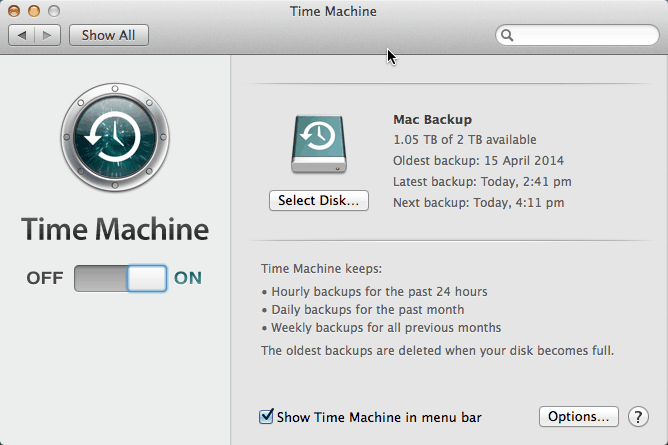
Time Machine takes backup of your files every hour, and saves it to your backup drive, (you can change the backup interval though). Time Machine backups up only the files that have changed after the last backup, which makes it very efficient and the backup takes less space on your hard drive. But once the free space on the backup drive gets exhausted, it deletes the old backups to make room for the new once.
Time Machine Backup Scheme
- Keeps hourly backups for the past 24 hours.
- Keeps daily backups for the past one month.
- Keeps weekly backups for every month before the last 30 days.
- Deletes the oldest backup if the backup drive becomes full and has no space for new backups.
The best feature about the Time Machine is the way it backups up only the changed files. The other good thing about it is the absence of many options and settings that comes with every backup application, which any normal user won’t need. Time Machine is the simplest and the best solution for taking backups of your Macintosh device.
Setting Up Time Machine
- Attach an external hard disk to your Macintosh device and then open ‘System Preferences‘
- Now select ‘Time Machine‘ from the settings listed. This will open the settings console of the Time Machine app.
- Now you need to select the disk you want to take backups on, and then turn the ON-OFF slider in the left pane to ON.
- You can optionally exclude items from the backup by adding folders to exclude from the Options menu.